SEAMLESS ZOOM INTEGRATION
Bring Zoom and DCalendar Together —The Smart Way to Schedule
DCalendar seamlessly integrates with your Zoom account so you can schedule, manage, and join Zoom meetings directly from your decentralized calendar. No switching apps, no extra steps.
Connect Zoom Now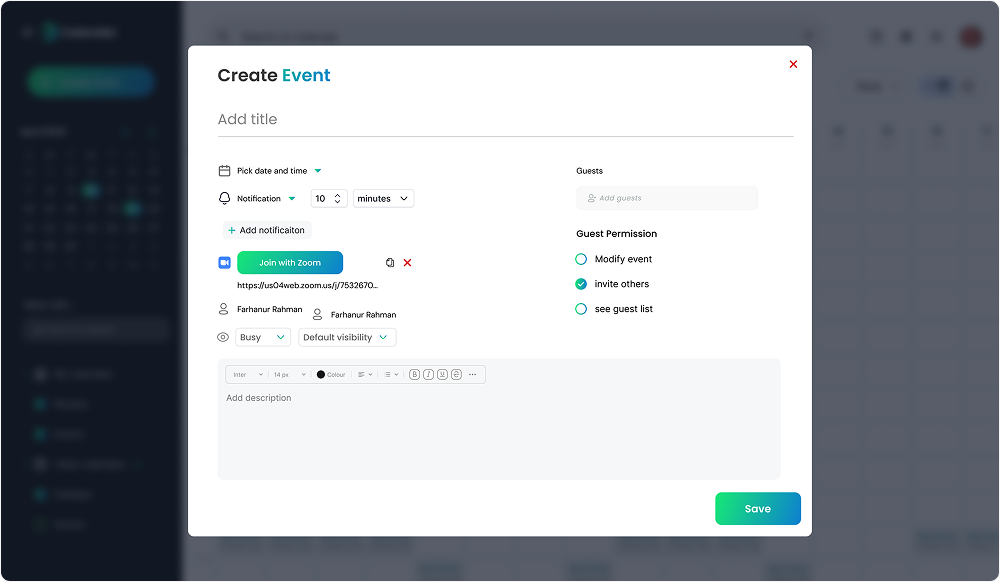
Features
Plan Smarter, Meet Faster—Right from Your Calendar
Whether you’re managing daily meetings or scheduling team calls, DCalendar + Zoom keeps everything organized, encrypted, and easy to use.
One-Click Zoom Integration
Easily connect your Zoom account in seconds. No complicated setup or passwords required.
Schedule Events with Zoom Links Built In
Create calendar events and instantly generate unique Zoom links, IDs, and passcodes—all added automatically.
Manage Everything in One Place
See your upcoming Zoom meetings, edit events, cancel calls, or copy invite links without leaving DCalendar.
Privacy-First Scheduling
All connections are secure. Your Zoom data is never stored, tracked, or shared.
Perfect for Anyone Who Uses Zoom—Simplified by DCalendar
No matter your profession, Zoom + DCalendar saves time and reduces friction—while keeping your schedule private.

Students & Educators
Schedule classes, office hours, or group sessions

Freelancers & Teams
Coordinate with clients and coworkers securely

Event Planners & Hosts
Set up webinars, demos, or workshops with ease

Remote Workers
Combine calendar + conferencing in one smart dashboard
How it works
Get Zoom Up and Running with DCalendar
Welcome to DCalendar, the world's first truly blockchain-based decentralized calendar application. This guide will walk you through installing the required components, using the app with your Zoom account, and managing your integration.
Adding Application
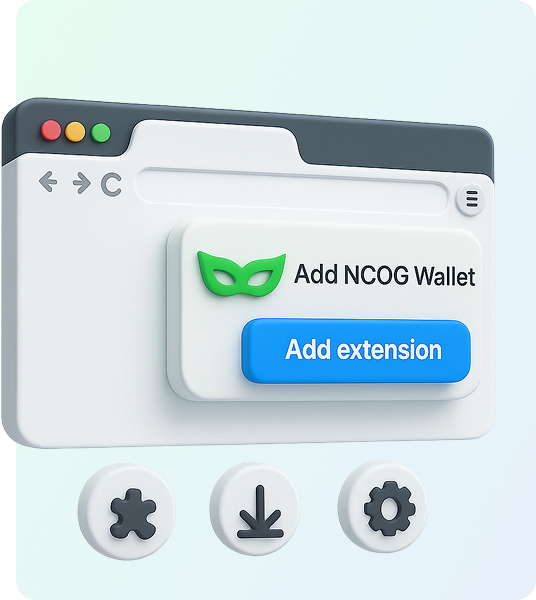
Step 1: Install the NCOG Wallet Extension
DCalendar is a decentralized application and requires the NCOG Wallet browser extension to function.
- Open your Google Chrome browser, click the Extensions icon (puzzle piece), and select "Manage extensions".
- Click the menu icon on the left and select "Open Chrome Web Store".
- In the web store, search for "NCOG Wallet".
- Find the NCOG Wallet in the search results and click "Add to Chrome".
- A pop-up will ask for confirmation. Click "Add extension". The wallet will now be installed.
Adding Application
Step 2: Create Your NCOG Wallet
DCalendar is a decentralized application and requires the NCOG Wallet browser extension to function.
- Click the Extensions icon in your browser and select the NCOG Wallet.
- Follow the initial prompts and select "Create a new wallet".
- Review the data usage policy and click "Agree".
- Create a strong password for your wallet. This password will be used to unlock your wallet on this device only. Confirm the password.
- Check the box to acknowledge that NCOG cannot recover this password for you. Click "Continue".
- You will be presented with your Secret Recovery Phrase. This is extremely important.
- Click "View" to reveal your phrase.
- Write this phrase down on paper and store it in a secure location. Do not save it digitally where it could be compromised. This phrase is the only way to recover your wallet if you forget your password or move to a new device.
- Confirm that you have saved your phrase and proceed to the verification step.
- Enter the requested words from your recovery phrase to confirm you have saved it correctly. Click "Verify & Continue".
- Your wallet is now set up. Choose your desired experience (e.g., "Data Wallet") to continue.

Adding Application
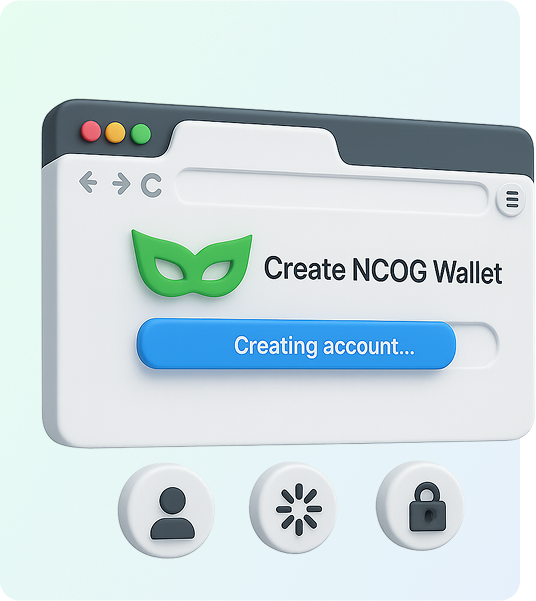
Step 3: Connect to DCalendar and Create Your Account
DCalendar is a decentralized application and requires the NCOG Wallet browser extension to function.
- Navigate to the DCalendar application at https://dcalendar.ncog.earth/app.
- On the welcome screen, click the "NCOG wallet" button to connect.
- You will be prompted to choose a unique username. This will serve as your decentralized identity.
- Click "Connect Wallet".
- Enter your desired username (e.g., test_user) and click "Confirm".
- If the username is available, click the confirm button again to register your account on the blockchain.
- After a brief loading period, your account will be created, and you will be taken to your new calendar.
Usage of Zoom with-in DCalendar
Step 1: Connect Your Zoom Account
To schedule Zoom meetings directly from DCalendar, you first need to authorize your Zoom account.
- In the DCalendar interface, click the Settings icon (gear) in the top right corner.
- Navigate to the "Integrations & Apps" section.
- On the list of available apps, find Zoom and click the Connect button.
- You will be redirected to the Zoom authorization page. Review the permissions that DCalendar requires:
- Enable Zoom App within Zoom Meeting Client
- Create, Update, View, and Delete a meeting for a user
- View a user
- View a user's token
- Click "Allow" to grant permission.
- You will be returned to DCalendar, where the settings page will now show that your Zoom account is connected.
Step 2: Create a New Event
Return to the main calendar view. Click on a date in the calendar to open the "Create Event" pop-up.
- Add Title: Give your event a name, such as "My Zoom Meeting."
- Set Time: Adjust the start and end times for the meeting.
- Generate Zoom Meet Link: Click the button labeled Zoom. A unique Zoom Meet link will be automatically generated and associated with the event.
Step 3 : Save the Event to the Blockchain
Click the Create Event button. A message will appear indicating that your data is being stored on the blockchain. Once complete, the event will appear on your calendar. You can click on it to view all details.
Removal of Zoom from DCalendar
Part 1: Disconnect the Zoom Integration from DCalendar
- Navigate to the DCalendar Settings page.
- Under the Integrations & Apps" section, click the "Disconnect" button.
- Your Zoom account will be de-linked from your DCalendar, and the app will no longer have access to your Zoom data.
Part 2: Remove the DCalendar App from Zoom
- Log in to your Zoom account and navigate to the Zoom App Marketplace.
- Click Manage > Added Apps or search for the DCalendar app.
- Click the "Remove" button next to the DCalendar app.
Troubleshooting
- "This site can’t be reached" Error: Please ensure you are navigating to the correct URL: https://dcalendar.ncog.earth/app. Check for any spelling mistakes.
- App is Slow or Stuck on "Loading from the blockchain...": DCalendar is built on a blockchain. Saving or loading data requires a confirmation on the network, which can sometimes take a few moments. Please be patient. If it persists, try refreshing the page.
- Error: "Please Install NCOG Wallet": This error appears if the NCOG Wallet extension is disabled or not installed. Please ensure the extension is installed and active in your browser to use DCalendar.
- Unable to Add a Zoom Meeting to an Event: Go to DCalendar Settings and verify that your Zoom account is still connected. If it shows "Login with Zoom," please follow the connection steps again to re-authorize the app.
Troubleshooting
Have a question?
Find answers to common queries about our products and services.
Your Secret Recovery Phrase is the master key to your NCOG Wallet. It's a unique series of words that grants access to all the data and assets associated with your decentralized identity. You are the only one who has it. If you lose it, no one can help you recover your account. Keep it safe and offline.
DCalendar is a Web3 application that gives you full ownership and control of your calendar data by storing it on a blockchain. The NCOG Wallet acts as your secure gateway to interact with this decentralized system, manage your identity, and approve transactions.
DCalendar + Zoom = Effortless Scheduling
Get Started with DCalendar